


Using the WhoDat Analytics Tool with WhoisXML API Data
Introduction
In this technical blog we offer some hints and tips to those who want to have an interactive tool for the analysis of WHOIS and IP resolution data. In particular, the MITRE Corporation, a not-for-profit company that operates multiple federally funded research and development centres and provides software for this purpose under the General Public License. It is available on GitHub at https://github.com/MITRECND/WhoDat
According to the information there, “The WhoDat project is a front-end project for whoisxmlapi data, or any whois data living in ElasticSearch. It integrates whois data, current IP resolutions and passive DNS. In addition to providing an interactive, pivotable application for analysts to perform research, it also has an API which will allow output in JSON or list format.” Indeed, after installing WhoDat one gets hold of a web-based, easy-to-use tool for querying IP and WHOIS data, which can be efficiently used for many tasks. For instance, here you can find a description on how it was used for searching on a spear-phishing link domain.
As for WHOIS data, WhoDAT relies entirely on the datasets that can be purchased from WhoisXML API, Inc. In what follows we will make some comments on the installation procedure of WhoDat, which can be done without much complication according to the documentation of the software. Then we are going to reach our main goal: how to obtain and load WHOIS data into this system to have an up-to-date database.
Setting up WhoDat
WhoDat is written in series 2 Python and uses ElasticSearch as a database backbone. There are two ways to install it: you may use a docker or install it from packages.
Our brief description here will be about installing it from packages under Ubuntu Linux, which is thus applicable also for Windows systems using Bash on Ubuntu on Windows. What will follow here is a brief step-by-step description to get it working quickly. It is in principle also possible to install ElasticSearch and WhoDat also natively on Windows systems, as well as on Unix-style environments other than Ubuntu Linux, but we cannot address all these cases here. However, the following comments may also be of some use if you undertake such a project, as the structure of the software can be understood from them. We assume that our reader has basic power user/system administrator skills.
Important note: we assume here that you plan to set up a server dedicated for the purpose. We do not discuss how to set up WhoDat besides other web services, but if you have sufficient expertise with Apache, you can manage that, too.
Let us now describe briefly the steps of the procedure.
- Get the software:
git https://github.com/MITRECND/WhoDat.git
Having downloaded the package, inside you will find a file named “README.md”, which contains sufficient information for the installation, both with a docker or from packages, as we do it right now. - WhoDat is essentially django-based. It can run from Apache with the appropriate modules, so we will need
sudo apt-get install apache2 libapache2-mod-wsgi
- We will need series 2 Python and its package manager, “pip” for installing some packages. If these are not yet installed we can do that by
sudo apt-get install python-minimal python-pip
- There are some other packages we can also install with Ubuntu’s package manager:
sudo apt-get install python-requests python-unicodecsv python-markdown python-django python-ply python-easygui
(We remark here that WhoDat does not need easygui, we install it because the software we will use later to obtain the data needs it.) We could have installed all these with Python’s package manager, “pip”, too. - We will need ElasticSearch, too. Download in a deb package, “elasticsearch-6.4.2.deb”, from https://www.elastic.co/downloads/elasticsearch
The latest version at the moment of writing this document is 6.4.2. WhoDat can work with any of them with the main version 6. Unfortunately, on Ubuntu the package does not have the proper dependencies. So to make it work flawlessly, one has to
sudo apt install openjdk-11-jre-headless

dpkg -i elasticsearch-6.4.1.deb
According to the advice on https://www.howtoforge.com/tutorial/ubuntu-elastic-stack/ we need to edit /etc/elasticsearch/elasticsearch.yml to have
network.host: localhost
http.port: 9200
and then restart the service:
sudo systemctl start elasticsearch

sudo systemctl enable elasticsearch
Afterwards you may do
curl -XGET 'localhost:9200/?pretty'
and observe the details of your ElasticSearch installation in the reply. - We will be in the need of the elasticsearch package of Python. As its version must match that of our ElasticSearch server, we will install it with Python’s package manager to have the latest one:
pip2 install elasticsearch
Note that we could have installed all the packages under step 4 in the same manner. Those who are interested in playing around with Python and ElasticSearch may enjoy the following blog: https://tryolabs.com/blog/2015/02/17/python-elasticsearch-first-steps/ - Finally, follow the simple steps under “### Local Installation” in the file “README.md”, with minor modifications on our Ubuntu system though. In particular, you need to copy recursively the subdirectory “pydat/pydat” under the distribution directory “WhoDat” into an apache-visible place, typically “/var/www/html” on Ubuntu systems, and provide appropriate permissions:
cp -r pydat/pydat /var/www/html/.

chown -R www-data /var/www/html/pydatafter
Next, copy "custom_settings_example.py" to "custom_settings.py" as requested:
cp /var/www/html/pydat/custom_settings_example.py \ /var/www/html/pydat/custom_settings.py

chown www-data /var/www/html/pydat/custom_settings.py
Then open the file with an editor and uncomment the line
#ALLOWED_HOSTS = ['*']
You may want to familiarise yourself with the contents of this file in more detail, e.g. to enable passive DNS or enable debug mode.
Then you need to create “/etc/apache2/sites-available/whois.conf” (in the README.md it is named “whois”, but apache on this system requires it under the name “whois.conf”) typically with the following contents:
<VirtualHost *:80>
        ServerName whois
        ServerAlias whois
        # Install Location
        WSGIScriptAlias / /var/www/html/pydat/wsgi.py
        Alias /static/ /var/www/html/pydat/static/
<Location "/static/">
            Options -Indexes
</Location>
</VirtualHost>
Once this has been performed, we enable the site and reload apache service
a2dissite 000-default.conf
a2ensite whois.conf
systemctl reload apache2
And we are done, later you will see at http://localhost WhoDat working. However, it does not yet have any data, so for the time being it will just produce an error. So now we have arrived at our main point: how to populate the underlying WHOIS database and how to keep it up-to-date.
Getting data from WhoisXML API feeds
Possibly the easiest way to download the data we need is to use the downloader scripts included with WhoisXML API’s client-side scripts and demos, available under https://github.com/whois-api-llc/whois_database_download_support
The whole package can be obtained via git. So we change into a suitable working directory and do
git clone https://github.com/whois-api-llc/whois_database_download_support
As we are using Python-based software, we will prefer using the downloader script written in series 2 Python, too, so we go into its directory:
cd whois_database_download_support/whoisxmlapi_download_whoisdata/
We refer to the documentation provided in the README.txt located in this directory for further details on how exactly this script operates. Also, if you prefer a BASH-based solution, you may choose the subdirectory “whois_database_download_support/whoisdownload_bash” instead, where a BASH script is provided with the same functionality.
Returning now to the Python 2 downloader script, “download_whois_data.py”, it can be used via a simple GUI if you run it without arguments. However, as it is likely that you will later want to automate this process, so we show here how to use it with command-line parameters. Running it as
./download_whois_data.py --help
will give a detailed list of options.
Just now, as documented in WhoDat’s “README.md”, we need a quarterly release of a WHOIS database to initially populate our ElasticSearch database WhoDat relies on. WhoisXML API releases a database four times a year; these are referred to as “quarterly databases”. There are two kinds of these: one for generic top level domains (gGTLDs), including the major ones as .com, .net, etc., as well as the so-called new gTLDS), and one for country-code top level domains (ccTLDs) such as, e.g. “. us”. Each quarterly release is identified by a version number which is incremented upon each release. At the time of writing the present blog, the latest gTLD database is v25, whereas the latest ccTLD database is v11. (For further details on quarterly releases it is worth taking a look at the Quarterly GTLD WHOIS Database Reference Manual and the Quarterly CCTLD WHOIS Database Reference Manual.) The data are provided in various formats and ElasticSearch needs “simple csv” files from the quarterly release.
So let us get the data: simple csv, for all gTLDs, from the quarterly database v25. To do this, the command line syntax is (note that our working directory is where the Pyhton script resides, the quotation below is a single command line):
./download_whois_data.py --username johndoe --password johndoespassword --verbose --feed whois_database --db-version v25 --all-tlds --dataformats simple_csv--output-dir /scratch/whois_data_download | tee download.log 2>&1
Of course you need to use your WhoisXML API credentials: replace “johndoe” with your username and “johndoespassword” with the corresponding password. We choose /scratch/whois_data_download as the directory to keep the files in. They will be in its v25/csv/tlds/simple subdirectory in one tarball for each domain, named e.g. “csvs.aaa.simple.tar.gz” in case of the TLD “aaa”. We have redirected the output to have a log of downloading. It will be a long process and will result in about 17 gigabytes of downloaded data.
So, if you want to have a full database with all TLDs, you need a large amount of resources: these 17 gigabytes will have to reside in an ElasticSearch database. It is doable, and you can organize it into a cluster, etc. However, it is beyond the scope of this blog to go into such detail. Hence, for the sake of demonstration, we will choose a smaller domain, namely “shop”. WhoDat will work also with loading data of one or a few domains only, but the search results will be restricted to these domains.
To download data only for this domain, instead of the previous command line, we can do the following:
./download_whois_data.py --username johndoe --password johndoespassword --verbose --feed whois_database --db-version v25 --tlds shop --dataformats simple_csv --output-dir /scratch/whois_data_download | tee download.log 2>&1
This is the way of the automated downloading of data. The downloader script has a number of useful features. It will restart download if there is a network timeout. It will verify the files by comparing them with their md5 sums which are downloaded, too. The return code of the program will reflect if there is any issue, so if you use it from your own scripts, you can evaluate the success of the download. You can find all the details in the specifications of the script.
For the time being we have downloaded "csvs.shop.simple.tar.gz". It contains csv files in a subdirectory "simple/csv". So having unpacked it,
tar zxvf svs.shop.simple.tar.gz
we will have the data there in the very format WhoDat can comfortably load.
Initial population of WhoDat
WhoDat has a very convenient script for loading the data into its ElasticSearch database. All we need to do is to follow the instructions of “README.md”, which say that we need to invoke the script with the appropriate parameters. The script itself resides in the "WhoDat/pydat/scripts" subdirectory of the WhoDat package, and it is named "elasticsearch_populate.py". It also supports the --help option, too.
Let us remark that if you run WhoDat and/or ElasticSearch from the docker, you have two options: you may either set up its Python dependencies as written in Section 1 of this document and run it locally, or you may use the script as well from Docker. You may find some hints in "WhoDat/docker/README".
In our present example we will just run the appropriate command line as described in README,md:
./elasticsearch_populate.py --verbose -d /scratch/whois_data_download/v25/csv/tlds/simple/simple/ -i '25' -s -x Audit_auditUpdatedDate,updatedDate,standardRegUpdatedDate,expiresDate,standardRegExpiresDate
And this will do the job indeed. After the operation we get some statistics on how many records have been loaded. Opening now the webpage of WhoDat on localhost, you will be able to perform searches, at least in the "shop" domain.
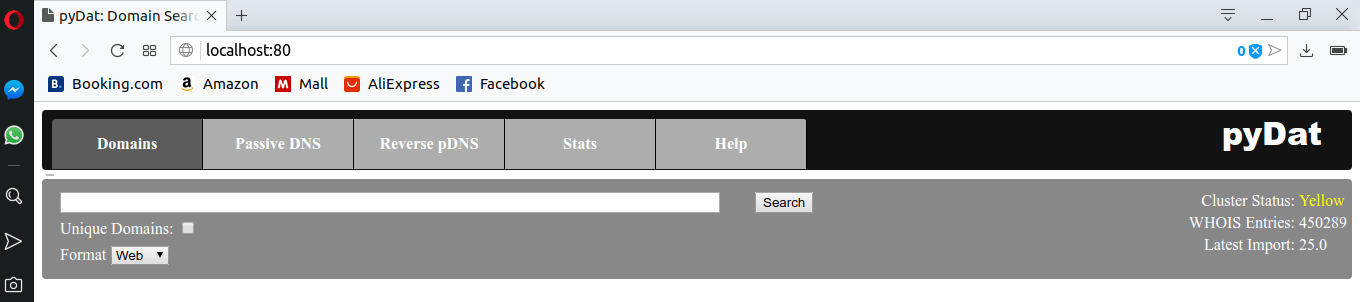
To illustrate this, let us open http://localhost in a browser now and play around with WhoDat. Initially you will see this:
Let us query for the string “skate” and click onto one of the records and click onto the “+” symbol in front of one of the records:
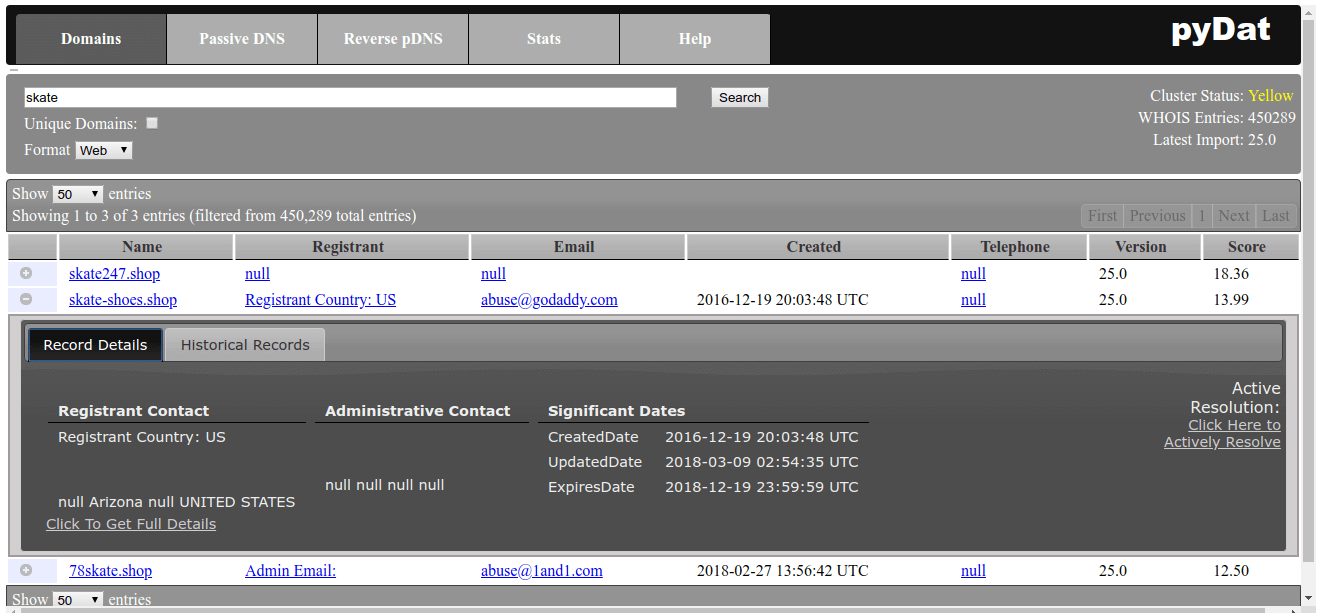
The data are not quite complete, but this is just by the nature of the WHOIS system nowadays. Nevertheless, this is all you can get about a domain and it is here. Of course to have a complete operation of the system, you need to set up passive DNS, etc, but at least the WHOIS data are there. But how do we keep them up to date?
Install daily updates
WhoisXML API provides daily updates reflecting the changes in domain registrations. These are organized into data feeds depending on their contents, functions, etc. It is important to take a good look at the Daily Domain Name Whois Updates Reference Manual (gTLDs), and the Daily Domain Name Whois Updates Reference Manual (ccTLDs) in order to obtain a basic understanding of these feeds, which is necessary to figure out what data you really need. The good news is: downloading and loading these data works in a very similar way as our initial population of the database. We will demonstrate this through two examples here.
Add newly registered domains
An important subset of daily changes are the newly registered domains. These domains and their WHOIS data are provided in the daily data feeds named "domain_names_whois" and "ngtlds_domain_names_whois" (for major and new gTLDs, respectively). To get such data, you can use download_whois_data.py in the following way. In the example, we download data for a single day, 2018.10.01., for our chosen domain, "shop", which is amongst new GTLDs:
./download_whois_data.py --username johndoe --password johndoespassword --verbose --feed ngtlds_domain_names_whois --startdate 20181001 --dataformats regular_csv --tlds shop --output-dir /scratch/whois_data_download
This will create the file "/scratch/whois_data_download/ngtlds_domain_names_whois/2018_10_01_shop.csv.gz" so after uncompressing it:
gunzip /scratch/whois_data_download/ngtlds_domain_names_whois/2018_10_01_shop.csv.gz
we will have a csv file to load into WhoDat.
We remark here that it is also possible to get the csvs for all the tlds in a single tarball for each feed. The appropriate command lines are:
./download_whois_data.py --username johndoe --password johndoespassword --verbose --feed domain_names_whois --startdate 20181001 --dataformats regular_csv_all_tlds --output-dir /scratch/whois_data_download
for major gTLDs, and
./download_whois_data.py --username johndoe --password johndoespassword --verbose --feed ngtlds_domain_names_whois --startdate 20181001 --dataformats regular_csv_all_tlds --output-dir /scratch/whois_data_download
for the new ones.
But let us return to the file for the "shop" domain and load it into WhoDat's database. Note that the format we have downloaded is "regular_csv" as the daily feeds do not provide "simple_csv" data. The difference is that regular csv files contain additional contact details in the feeds having certain name prefixes (billingContact zoneContact technicalContact). But these fields are ignored by “elasticsearch_populate.py” by default, so all we need to do is
./elasticsearch_populate.py --verbose -z -f /scratch/whois_data_download/ngtlds_domain_names_whois/2018_10_01_shop.csv -o "2018_10_01_newly_regd" -s -x Audit_auditUpdatedDate,updatedDate,standardRegUpdatedDate,expiresDate,standardRegExpiresDate,registrarIANAID
– and we are done. You can verify that WhoDat will find these records if you use its web interface.
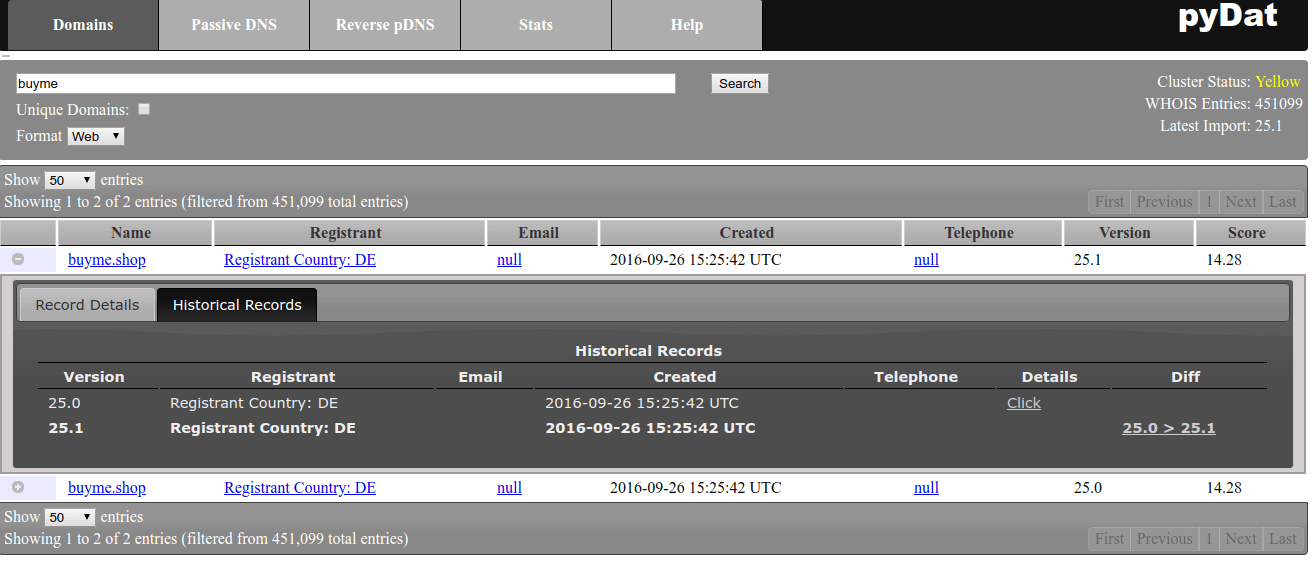
To demonstrate what we have done, let us search for the string “buyme”. After clicking the “+” in front of the 25.1 version of the found record, you will see that it has now historic records, too:
Adding newly dropped domains
As another example, consider those domains which have been dropped on a given day. Their WHOIS record will not disappear but it will contain a special status, e.g. "pendingDelete". To get these data, you need the feeds "domain_names_dropped_whois" and "ngtlds_domain_names_dropped_whois". To illustrate how it works, we will just quote the two respective command-lines:
For downloading we just change the feed name:
./download_whois_data.py --username johndoe --password johndoespassword --verbose --feed ngtlds_domain_names_dropped_whois --startdate 20181001 --dataformats regular_csv --tlds shop --output-dir /scratch/whois_data_download
whereas for loading the uncompressed data file into the system we have to
./elasticsearch_populate.py --verbose -z -f /scratch/whois_data_download/ngtlds_domain_names_dropped_whois/2018_10_01_shop.csv -o "2018_10_01_newly_dropped" -s -x Audit_auditUpdatedDate,updatedDate,standardRegUpdatedDate,expiresDate,standardRegExpiresDate,registrarIANAID
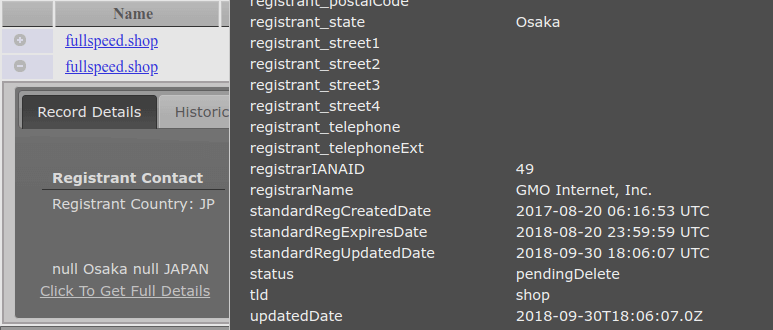
To demonstrate what has happened now we will search for the word “fullspeed”. It will have a new record with the “pendingDelete” status after clicking “+” in the newer version of the record and clicking “Click To Get Full Details”:
Other types of data
There are other types of daily feeds, too. For instance, you can find domains which have changed their nameservers, which have changed their other WHOIS data, etc. You can find their specifications in the aforementioned daily feed manuals. All these feeds are supported by the downloader scripts, so they can be used in a fashion very similar to the above examples.
Concluding remarks
WhoDat is a comfortable web-based tool for analysts to make WHOIS and DNS queries. As for WHOIS, it relies on the datasets available for purchase from WhoisXML API, Inc. Here we went through an actual local setup procedure to demonstrate how to get this tool working and how to load WHOIS data into it. This data loading includes an initial population with a quarterly WHOIS database as well as loading daily data in the form of updates. This overview can be also seen as a hint to create an automated script for performing daily updates (e.g. from a scheduled daily job). The actual schedule of such an update procedure can be designed on the basis of the schedule of the daily feeds which can be found in their manuals.